✍️
Note
Heads up! Phase gets little updates and improvements all the time. Our tutorials might be a tad different from the current app.
Export
When an animation is finished or ready to be tested out, it can be exported into a fully rendered video or animation file. Usually this is used at the end of the design process, but it can also be handy for preserving an offline copy of the file
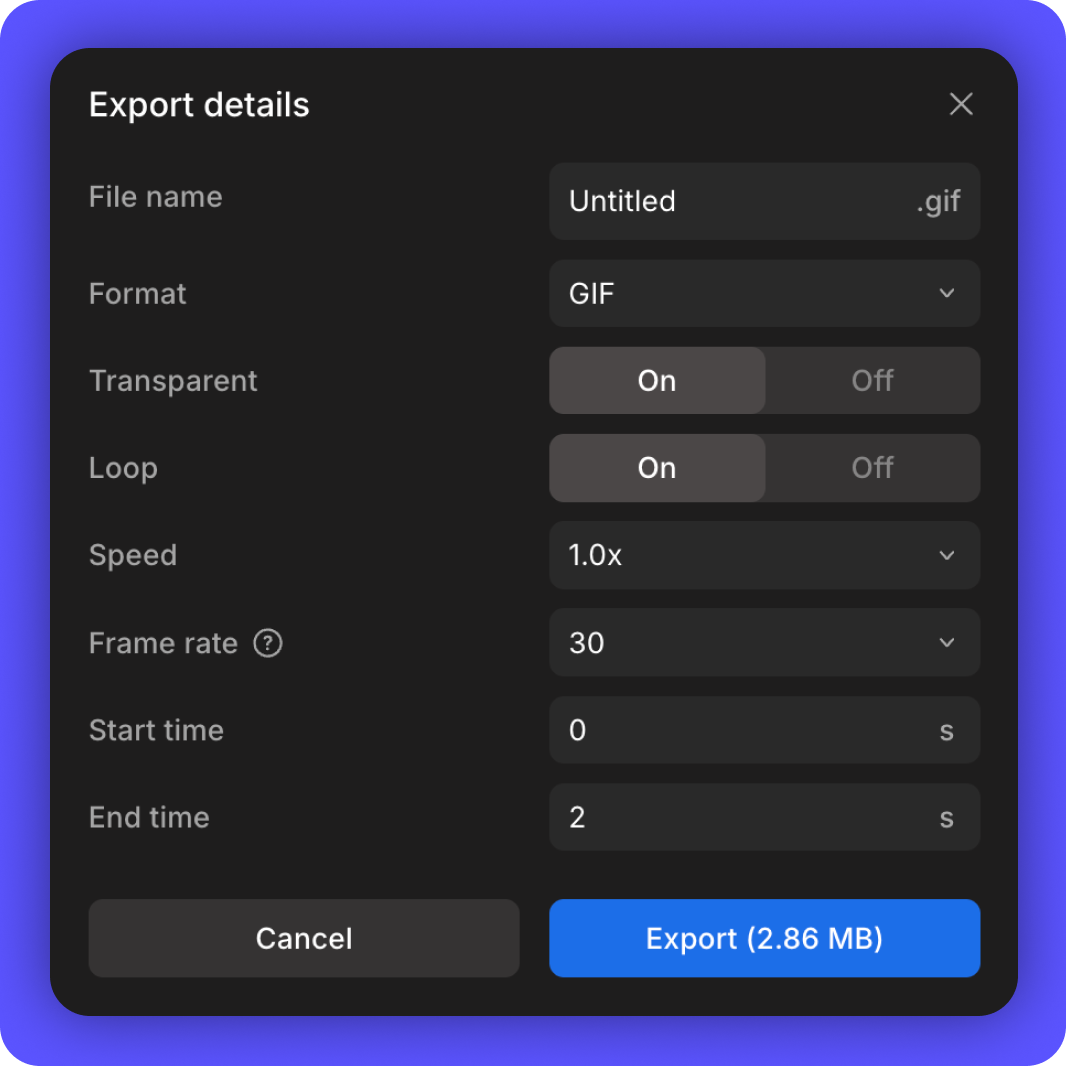
Exporting Files
Different Methods For Accessing Export Menu.
- From the Phase canvas, click the blue Export button in the top right corner. Alternatively, we can also Export via the hamburger menu on the left side.
- Configure the export settings in the window that appears. See below for more details.
- Press Export. When exporting as GIF or MP4, a loading screen appears, and the exported tab will be paused during the export process.
In the Export menu there is a range of export options for tailoring projects to suit any preferences. Export the animation in various formats, such as a shareable GIF, a high-quality MP4, or two types of Lottie file formats, JSON and dotLottie, for interactive web animations. JSON files are text-based and thus facilitate animation sharing across different platforms, while dotLottie files compress animation data while embedding all necessary resources into a single file, resulting in smaller file sizes.
Each format has a few common options:
- File Name: Give the animation a recognizable name to help differentiate it from other files.
- Speed: Make the animation play faster or slower than the original timeline. The options are in multiples: 0.25x, 0.5x, 1.0x, 1.25x, 1.5x, and 2.0x.
- Frame rate: Change the smoothness of the animation by adjusting its frame rate, or FPS. The options are 24, 30, 50 (GIF only), or 60 (Lottie or MP4 only).
- Start time: Set a different start time to clip the animation from the front. This defaults to 0, and normally, it can be left alone.
- End time: Similar to the start time, cut the animation down from the end. This defaults to our maximum animation length, and usually doesn't need to be modified.
While exporting is relatively straightforward, there are some key differences worth noting about each format, as outlined in the sections below.
GIF and MP4 Export Notes
 GIF Option |  MP4 Option |
While GIF and MP4 share the common customization options listed above, there are a few distinctions listed here.
For GIFs, parts of the animation can be made Transparent. All pixels that are completely transparent (Opacity 0%) will not be shown in the animation. Note that we must either remove the Screen fill or set the screen fill to Opacity 0% for this to work.
Additionally, GIFs can be set to automatically Loop. This aspect is usually controlled by the place that the GIF is hosted, but a default setting can be applied to the graphic itself.
With MP4s, we gain control over video Quality. The options range from Ultra and High—ideal for intricate projects with gradients and detailed content—to Low and Medium, which offers color compression.
Lottie Export Notes
Lottie Export Menu.
The export window changes when we select Lottie. Exporting a Lottie comes with a preview screen, a Play button and a slider track. This helps us sample our animation before exporting it. We can also see an estimate of the File size.
Since Lottie format has a specific feature set, and some features are not supported by Phase or vice versa, there is a chance that the preview animation may look different than the rendering window. Sometimes adjusting the animation can fix disparities between the two.
Lottie Preview Limitations
Legend
 Fully Exportable
 Partially Exportable
 Not Exportable
Fully Exportable
Partially Exportable
Not ExportableStart Animating
Get Started with Our Free, Web-Based Platform.
Learn
© Phase Software GmbH 2025