✍️
Note
Heads up! Phase gets little updates and improvements all the time. Our tutorials might be a tad different from the current app.
Paths
Paths are what we call complex shapes in Phase. These can be lines, curves, polygons, blobs, or combinations of all those forms. Even though their category is very open-ended, paths are simple and intuitive to make.
✍️
Note
For those unfamiliar with using shapes and the layer panel, check out our
Shapes article.
Creating Paths
Creating a Triangle Using The Pen Tool.
- Select the pen icon from the menu bar in the top left corner of the canvas. The pen tool is used to make sets of points to form complex shapes.
- Click the canvas to add a point. A line connects it to the next point, which we can place while pressing to snap to 45° angles or Esc to disconnect the previous point and start a new shape.⇧ Shift
- Modify the path properties. Read more about this in the "Path Properties" section below.
- Press or choose another shape to finalize a path. Paths offer unique settings not found in basic shapes, but once finalized, they can be modified like any other shape. Press⏎ Enteragain on a completed path to edit its points.⏎ Enter
Path Shapes
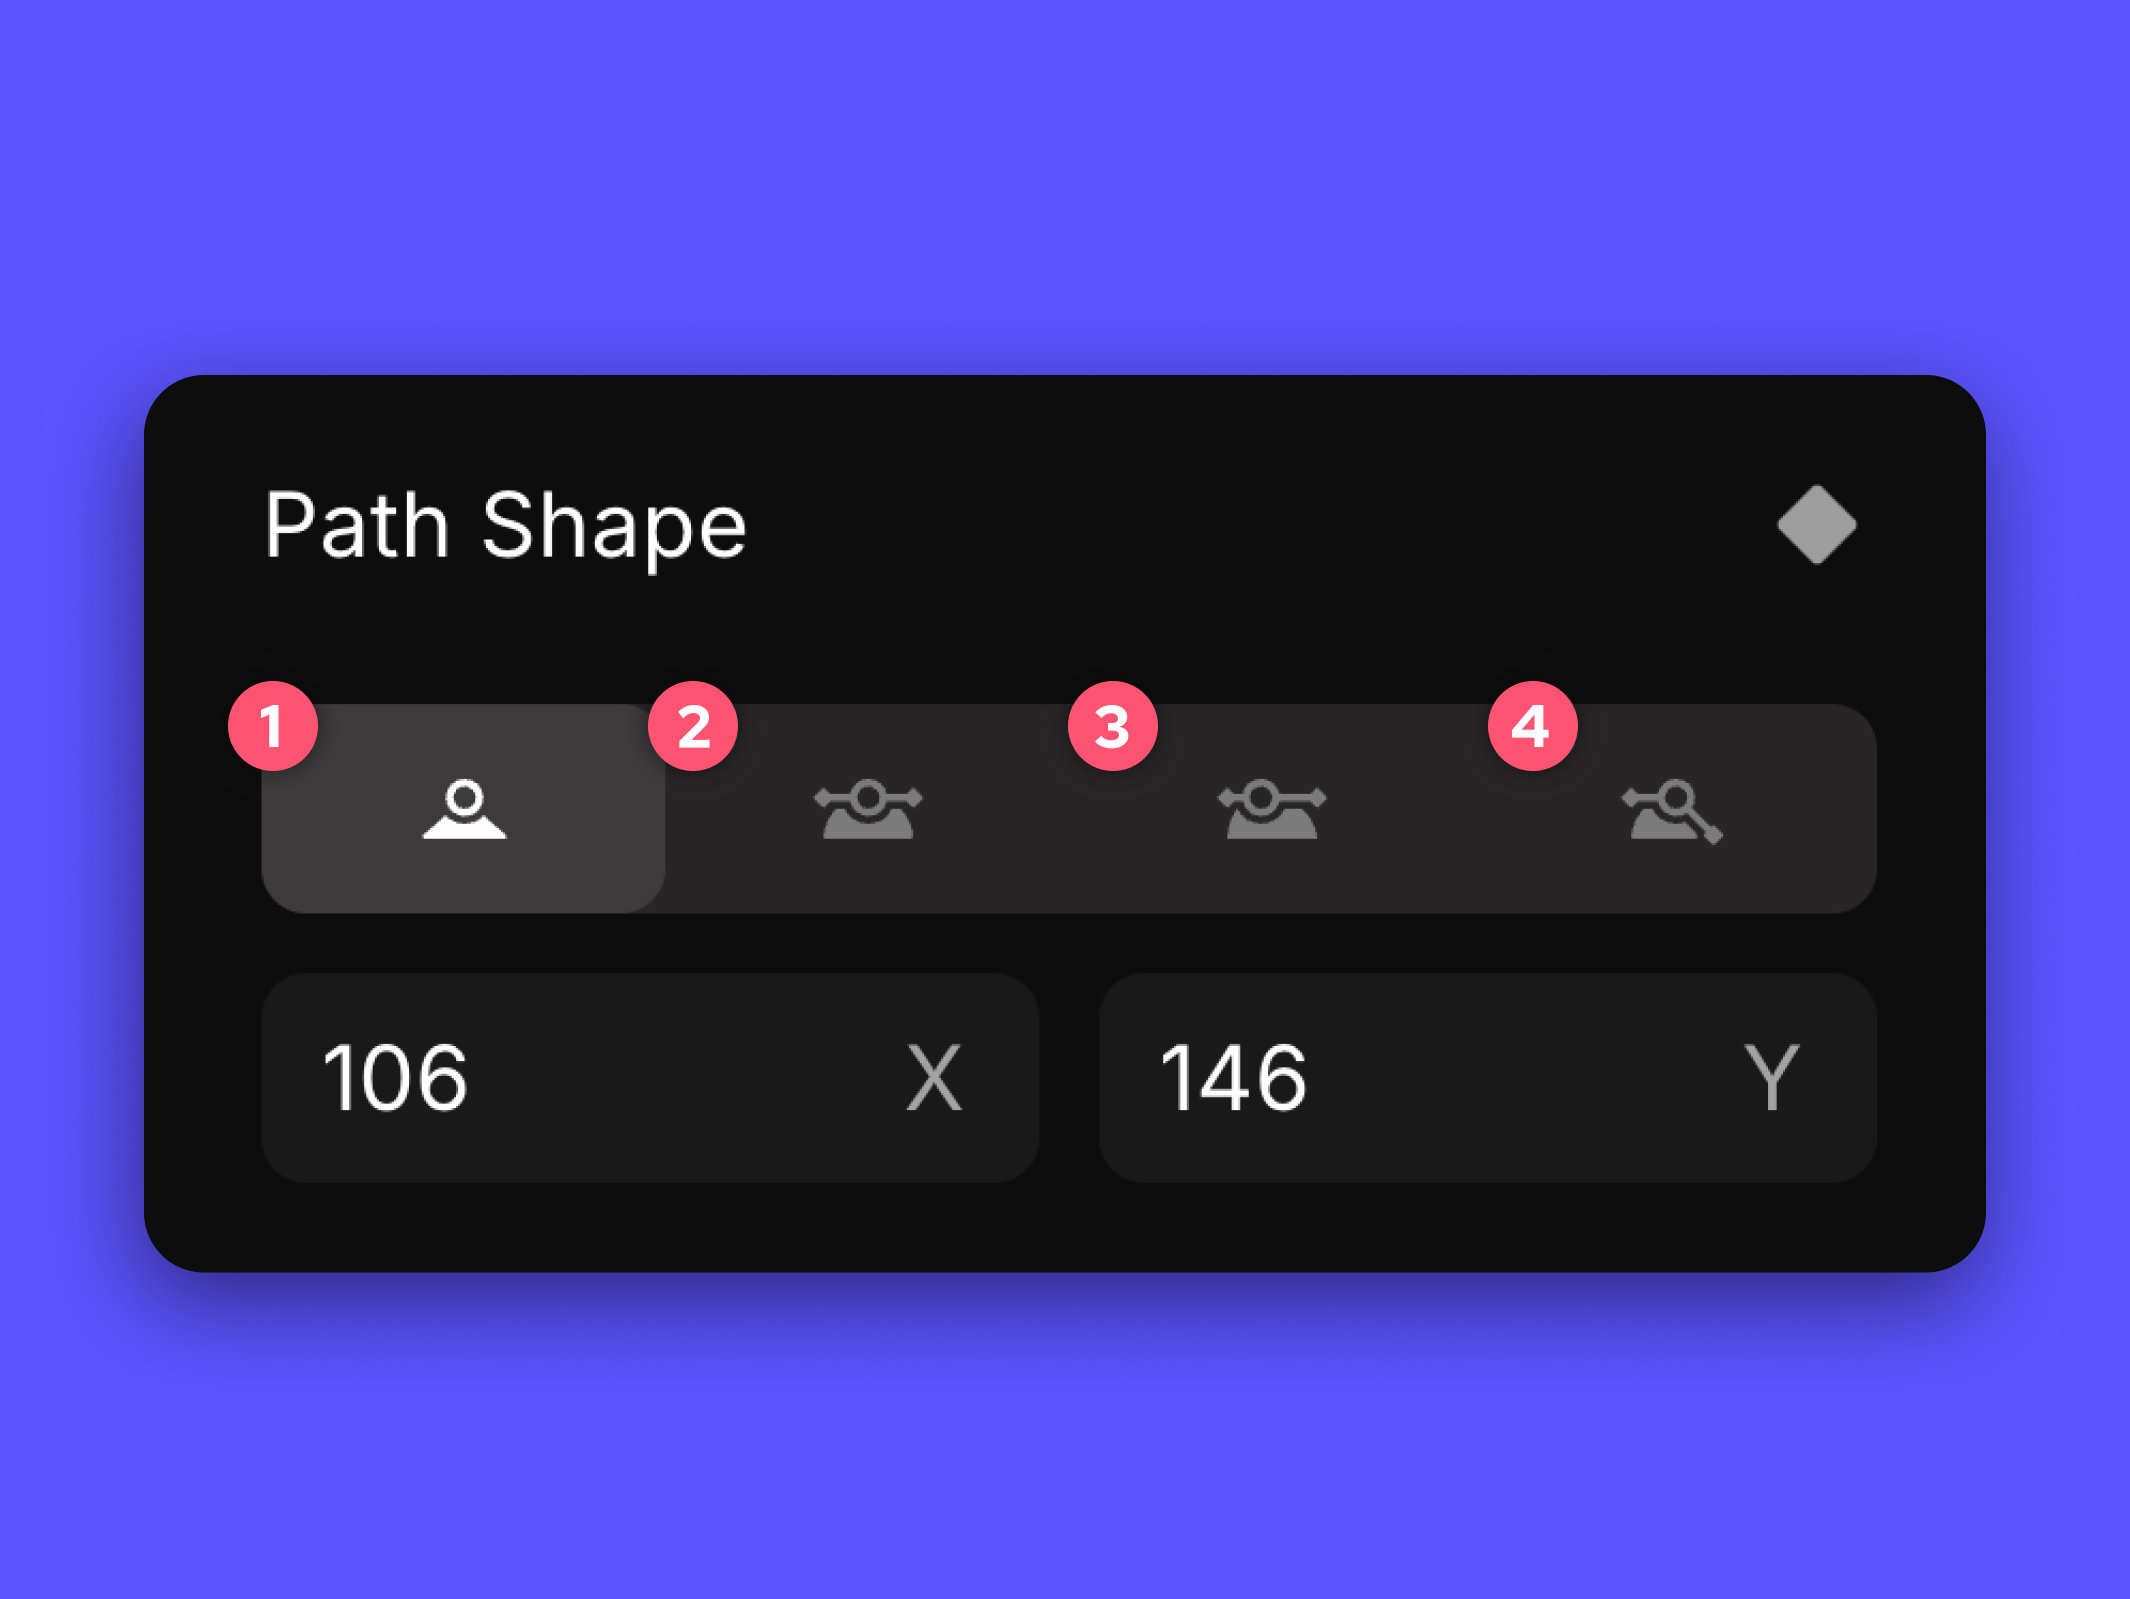
A path's properties change depending on whether we're modifying points or the whole shape. While still in point edit mode before pressing or deselecting, a unique Path shape property appears with four options:
⏎ Enter
1. Straight
The straight path shape has a sharp angle at the point with no curve. This is the default shape and does not have an adjustment handlebar.
2. Mirrored
The mirrored path shape has a central curved angle with a handlebar extending both sides. The handle points on either end adjust the curve equally, like a mirror.
3. Asymmetric
The asymmetric shape works like the mirrored but handlebar lengths can differ. Rotating one handle point affects both sides, while inward/outward adjustments only impact the handled side.
4. Independent
The independent shape provides full control over each point's rotation and length separately. Although this enables complete curve freedom, non-straight handlebars create spikes or bumps at the central point.
Path Properties
Under the Path Shape properties exclusive to Paths, we find other editable properties in the Panel shared with other Phase elements:
X/Y position, corner radius, opacity type and percentage, plus fills, borders and extra effects like Trim Path.
📖
Read More
We have a dedicated page that offers a closer look at Properties in Phase, so make sure to check it out.
Animating Paths
Showing A Seal Animation Created With Paths.
Path interpolation, also called shape morphing or just interpolation, is an animation technique for transitioning between two different shapes or paths. It works by generating in-between shapes between the start and end points.
- Press after selecting a shape.⏎ Enter
- Click on the pen tool and add some new points to our shape. Note that the pen tool is inaccessible from Animation Mode. To add more points, switch back to design mode.
- Hover over any line on a shape until the line turns red, and then click to add new points. Repeat this step as many times as desired.
- Turn on Animation Mode. See the Animation article for more details about animation and keyframes.
- Add a keyframe at 0 seconds, only if needed.
- Move the playhead to a new point.
- Move the points on our shape to new locations.
- After moving points to change the shape, add a new keyframe. The time between keyframes controls the duration of the shape transformation. We can adjust as needed.
- Press play and watch our element seamlessly change into another shape.
Start Animating
Get Started with Our Free, Web-Based Platform.
Learn
© Phase Software GmbH 2025