Prototyping

What Is Prototyping?

In prototyping tools, prototyping defines how designers simulate the behavior of a product before it’s built—whether that’s navigating between screens, interacting with buttons, or transitioning between different states of a user interface. Prototypes allow designers to test and refine how users will engage with the product, providing a way to visualize user flow and interactions early in the design process.
Many tools, like Figma, allow basic frame-to-frame transitions. However, these stop at visual prototypes. You can’t run multiple interactions simultaneously or export them as functional code.
Phase takes it a step further. With automatic keyframes, Phase enables designers to create interactive prototypes without any coding and export them as production-ready code. This bridges the gap between design and development.
Phase gives designers full control, from simple hover effects to more advanced logic, including:
  • Decision-Based Interactions: Display different screens based on user choices.
  • Conditional Interactions: Trigger actions based on rules (e.g., if the cart total > $50).
  • Looping Interactions: Reinforce learning by looping back on incorrect answers.
Phase combines visual design with logic to help you build interactive prototypes that work like the final product.

Important Terms

  • Action: An Action is what the user does (e.g., hover or click) and what happens afterward (e.g., an animation). It connects a Trigger to a Response, making it an interaction block.
    • Trigger (User Input): A Trigger is what starts an interaction. It consists of two parts: an Event (like clicking or hovering) and a Selector (the item you interact with, like a button).
      • Event: The type of Trigger, such as a click, hover, or load.
      • Selector: The Element you interact with, such as a button or an image.
    • Response (Outcome): The Response is what happens visually on the Canvas after you interact with the Selector, such as an element fading in, scaling, or moving.

How to Create an Action (Interaction)

Creating Interactions in Phase is easy! Follow these simple steps to add an interaction to your design:
  1. Import Your Design from Figma to Phase: Use the Import to Phase plugin to import your Figma design. Phase will automatically organize components and their interactions as Actions. Alternatively, you can design directly in Phase.
  2. Add an Action: Select the element you want to interact with and click the 'New Action' button in the bottom editor. This will activate the Action Bar. Once the "New Action" button is clicked, you will enter Action Mode.
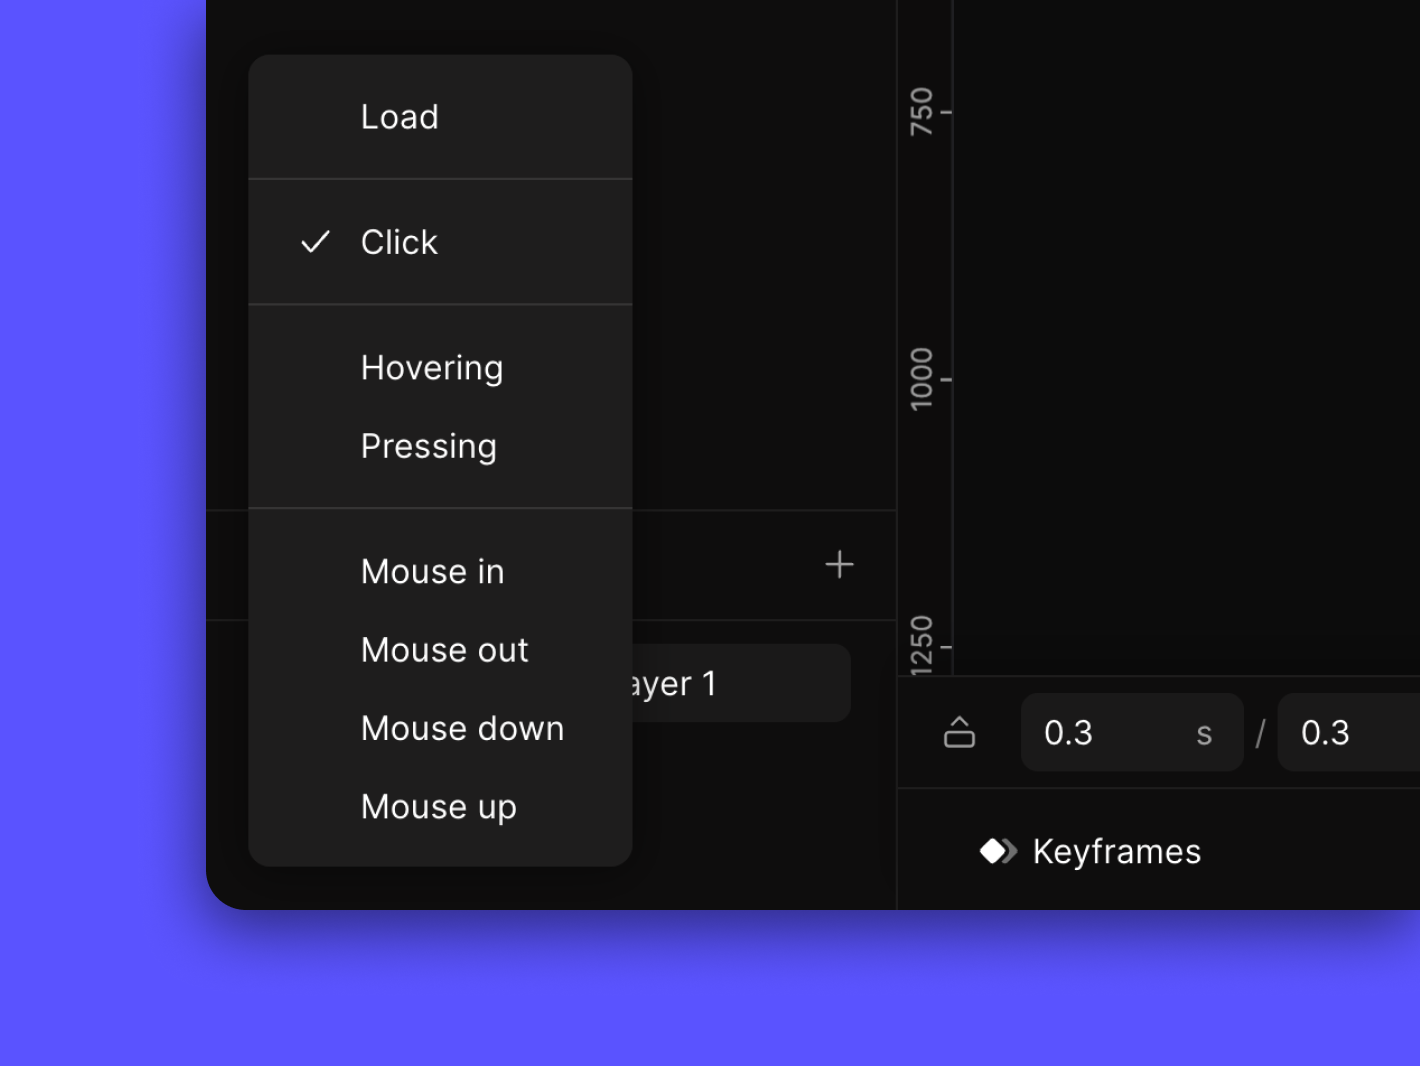
  3. Open Triggers Settings: When you add an Action, the Triggers Settings Panel appears. Here, you define the Trigger and the Response.
    • Trigger: Consists of an Event (e.g., hover, click) and a Selector (the target element).
    • Response: The visual change triggered by the event (e.g., scaling the puppy by 150%).
  4. Example:
    • Trigger: Hover over the puppy image.
    • Event: Hover
    • Selector: Puppy
    • Response: Puppy enlarges by 150%.
  5. Set Up the Response: Once your Trigger is set, you can create the Response either by adjusting the element directly on the canvas or by using the property panel for more precise editing. [Learn more about Animations]
  6. Leave Action: To leave an Action, click on the “x” button on the right side of the Action Bar.
  7. Prototype Mode: To see your interactions in action, enter Prototype Mode by clicking the play button in the top-right corner.
  8. Find your Action: To find a specific Action, click on the Action Indicator right next to the Element where the Action is located to open the Action List Dialog or click on the Full Action List.
  9. Export: To export an Action, select the one you wish to share. It will be exported as an animation in formats like GIF, MP4, JSON, and DotLottie. [Learn more about Export] Note that the Action will be exported according to the Action Scope.
  10. Collaborate: Invite others to review your prototype:
    • Restricted Link: Allows others to edit the file with you with a multi-cursor view.
    • Remix Link: Lets others copy your file to their dashboard without editing the original.
    • Prototype Link: Shares only the final prototype without editing access.

Action Scope

Action Scope defines where the Trigger and Response are applied within an Action (i.e., where the Action is active and visible). Instead of creating all Actions directly on the Screen, Actions are scoped to specific elements. This approach makes managing complex designs easier and more organized.
For example, if both the Trigger and Response are applied to Element 1, the Action Scope will be set to Element 1.
If you have two elements on the same level, with the Selector on Element 1 and the Response on Element 2, the Action Scope will automatically expand to the lowest common parent—Container 1, in this case. This happens because only the parent (Container 1) can control both children (Element 1 and Element 2). In this example, the Action Scope refers to the area where both the Trigger and Response are active within that scope (see the image attached below).
When exporting an Action, it will be exported as an animation based on the Action Scope. For instance, if the Action Scope is set to Container 1, which includes Element 1 and Element 2, the Action will be exported with only Container 1 as the animated element. Any elements outside the scope will not be included in the exported animation along with Container 1.

Other Terms

  • Action Bar: A floating UI at the bottom of the Canvas that allows quick control over different modes and actions when in Design Mode or Action Mode.
  • Triggers Settings Panel: A panel that appears at the bottom of the Content Panel that allows the user to manage Triggers and Responses for the selected Action.
  • Full Action List: A list for displaying all Elements in the File with their hierarchy along with the Actions created on each Element.
  • Action Indicator: The lightning bolt icon next to an element indicates which Action has been created on that element. You can click on the Action Indicator to expand the Action List Dialog.
  • Action List Dialog: The Action List is a floating panel where you can see, select, and manage Actions created for an element. You can also move Actions to new Scopes.
    • Action Scope: Action Scope defines where an Action is used and seen. If you move an element, Phase automatically updates the Action's location based on the scope, helping keep your prototype organized. [Learn more about Action Scope]
  • Duration: The total time of the animation from start to end (ending at the last keyframe time).

FAQ

  • How many Triggers can I add to an Element?
    • You can add as many Triggers as needed to an element.
  • Will we be able to create conditional interactions?
    • Will we be able to create conditional interactions?
  • How do I ensure my interactions work well on mobile?
    • You can preview prototypes on mobile. For mobile interactions, use press or tap triggers for better responsiveness.
footer

Start Prototyping

Get Started with Our Free, Web-Based Platform.